Saturday, October 25, 2008

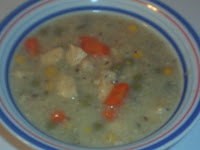
Homemade Chicken Noodle Soup


Now that fall is setting in, it is time for soup. This is a freshly concocted recipe for some chicken noodle soup that turned out really well. I wanted some soup and had a lot of things on hand and just threw it all together and tested it on the family. It went over well. I made a creamy version, but you can leave out the cream of chicken soup and just have it with a chicken broth if you want.

Homemade Chicken Noodle Soup

8 cups chicken broth
2 chicken breasts, diced
1 can cream of chicken soup (optional, it just makes it a creamy chicken soup)
1 cup frozen peas
1 large carrot, peeled and diced
1 can corn
2 stalks of celery, diced
1/4 cup chopped onion
1 clove of garlic, minced or pressed
1 Tbsp parsley flakes, or fresh chopped parsley
1 tsp poultry seasoning
1 tsp dried basil leaves, or fresh chopped basil
1/2 tsp ground pepper
1/2 tsp celery seed
* 1 tsp salt, only if using low sodium chicken broth or you can salt your soup to taste when served
6 oz pasta (can use small egg noodles, vermicelli, small shells, or elbow macaroni; those are my recommendations anyway, I used vermicelli in my soup)

Combine all ingredients in crock pot except for pasta and turn it on low for 8-10 hours. In the last hour of cooking, add pasta.

If you want to freeze this soup, just put it into plastic freezer containers and label with the date and freeze. It will keep in the freezer for 3 months. Then to reheat, just put frozen soup in a saucepan, turn on the heat to low and wait until it is hot.


Digg!

Stumble Upon Toolbar

Thursday, October 23, 2008

Pumpkin Swirl Cheesecake


This is a dessert that is easy to make, but it does take some time to bake. But, it is so yummy with a bit of whipped cream. You can freeze this into individual portions but it does have to be refrigerated. I also will include directions at the bottom if you do not have a springform pan, it is very easy to make in a 13x9" baking dish. In this recipe, I used fresh pumpkin since I felt ambitious and bought sugar pumpkins but it is also just as good using canned pumpkin. I found this recipe in my Fall 2006 issue of Kraft Food and Family magazine of which I subscribe to and it comes in my mailbox every season. If you have not already, get this subscription. It is free and has many many wonderful recipes and you can subscribe at Kraft Food and Family Magazine and Email subscription. You can opt for email recipes or just sign up for the Kraft Food and Family Magazine.

Pumpkin Swirl Cheesecake

Crust:
25 Nabisco Ginger Snaps Cookies, finely crushed (about 1 1/2 cups)
1/2 cup finely chopped pecans
1/4 cup butter (melted)

Pumpkin Filling:
4 pkg (8 oz each) cream cheese, softened
1 cup sugar, divided
1 tsp vanilla
4 eggs
1 cup canned pumpkin or fresh pumpkin (directions for fresh pumpkin are as follows below)
1 tsp ground cinnamon
1/4 tsp ground nutmeg
dash of ground cloves (I used 1/8 tsp)

Preheat oven to 325 degrees (300 if using a dark pan). Mix ginger snap crumbs, pecans, and melted butter; press firmly onto bottom and 1 inch up side of 9 inch springform pan.

Beat cream cheese, 3/4 cup sugar, and vanilla with electric mixer until well blended. Add eggs, 1 at a time, mixing on low speed after each addition just until blended. Remove 1 1/2 cups batter and set aside in a small bowl. Stir in remaining 1/4 cup sugar, pumpkin, and spices into remaining batter. Spoon half of the pumpkin batter into crust; top with spoonfuls of half of the reserved plain batter. Repeat layers. Cut through batters with knife several times for the swirl effect.

Bake 55 minutes or until center is almost set. Cool completely and remove springform pan sides. Refrigerate 4 hours or overnight, cut into 16 slices. Store leftover cheesecake in refrigerator. Serve with whipped cream if desired.

Notes:
- If you do not have a springform pan, you can use a 13x9 inch baking dish. Line with foil and extend the foil over the edges. Prepare as directed, reduce baking time to 45 minutes or until center is almost set.
- You can use 1 1/2 cups crushed graham crackers in the place of ginger snap cookies.
- You can use fresh pumpkin instead of canned. It is a bit more work but it can be done. To do this, get one pie pumpkin or sugar pumpkin (they are small, cut them in half after removing stem, take out seeds, bake flesh side down in 350 degree oven for 1 1/2 hours and then cool. Spoon out cooked pumpkin from skin and puree in blender or food processor until smooth, use as you would use canned pumpkin. Refrigerate any leftover pumpkin and it will keep in refrigerator for 5 days.


Digg!

Stumble Upon Toolbar

Wednesday, October 15, 2008

Pumpkin Muffins

A very good friend of mine gave me this recipe for pumpkin muffins with a few variations. This is a great muffin for snack or breakfast during the fall weather. Picture this muffin with your morning coffee. It is yummy warmed up with a bit of butter or honey on it.


Pumpkin Muffins

1/4 cup soft butter or margarine
1 cup sugar
1 cup fresh or canned pumpkin
2 eggs
1 1/4 cups milk
3 1/2 cups flour
4 tsp baking powder
1/2 tsp cinnamon
1/2 tsp nutmeg
1/2 tsp salt
1 cup raisins

Preheat oven to 400 degrees. Grease muffin tins or place paper liners in muffin tin. Cream butter (or margarine) and sugar until fluffy. Beat in pumpkin and eggs. Mix in milk. Sift together flour, baking powder, cinnamon, nutmeg, and salt in a separate bowl. Make a well in the middle and pour in pumpkin mixture. Add raisins. Mix just until dry ingredients are moist. Spoon into muffin tins and bake 20 minutes. Insert toothpick into center and it is done when it comes out clean.

NOTES:
- DO NOT over mix, if this happens you get tunnels in your muffins and they become very dry and tough. Mix just until dry ingredients are moist, and then stop stirring. It may look like there are lumps of dry ingredients but it will even out in the oven.
- If you use fresh pumpkin, I suggest getting what is called a sugar pumpkin (they are smaller then traditional pumpkins and usually made into pies and other dishes) and then either steam it or bake in the oven until it is fork tender and then cool and mash to use in recipes. It does make the dish taste much better despite the fact that canned pumpkin is much more convenient; it just becomes a toss-up whether you have the time or the desire to use fresh pumpkin as it is a bit time consuming preparing it for the recipes.

VARIATIONS:
- You can substitute finely chopped carrots or zucchini for the pumpkin for a different flavor of muffin or if you do not have pumpkin available.
- For a nutty struesel topping: Mix together 1 cup brown sugar, 1/4 cup butter or margarine, and 1/4 cup chopped nuts. Mix until mealy and then put on top of muffin batter in tins before baking and bake as directed.
- Maple Oat Topping: Mix together 1 cup brown sugar, 2 Tbsp maple syrup, 1/4 cup rolled oats in a bowl until mealy. Top muffin batter with topping before baking and bake as directed.


Digg!

Stumble Upon Toolbar

Tuesday, October 14, 2008

Caramel Sauce

I had a great request from one of our friends in India in regards to the Banana French Toast... and I quote from her comment:

"But I also have another question how in heavens does one make caramel sauce? In India, one has to make everything, not much comes out of a packet or a tin and even if it does, it tastes quite nasty, and the thought of hunting down caramel sauce is far too exhausting, it's quicker to just make it oneself, so please tell me a recipe for caramel sauce."

Ok Madhavi, here is a great recipe which I use when I actually have the time to make my own caramel sauce (usually during the holidays, it makes a great gift in a jar for caramel lovers also). This is a great recipe and very easy and even has microwave directions for those who want to save time during this busy holiday season. I am sorry about no picture, but I haven't made any yet but it is on my list.

Caramel Sauce

1/2 cup packed brown sugar
1 Tbsp cornstarch
1/2 cup light cream
2 Tbsp light corn syrup
1 Tbsp margarine or butter (I prefer to use butter because it gives it a better flavor)
1/2 tsp vanilla

In a heavy saucepan, mix sugar and cornstarch. Stir in 1/4 cup water. Stir in cream and corn syrup. Cook and stir until bubbly. Cook and stir for 2 minutes more. Remove from heat, stir in margarine or butter and vanilla. Serve warm over the Banana Pecan French Toast.

Microwave Directions:
In a 2 cup measure, mix sugar and cornstarch. Stir in 1/4 cup water, then cream and then corn syrup. Micro-cook, uncovered 100% power (high) for 2-3 minutes or till bubbly, stirring every minute till slightly thickened, then every 30 seconds. Stir in margarine or butter and vanilla. Serve as above.

Notes:
- This is also a great sauce over ice cream or other desserts
- Makes a great gift in a jar for anyone who loves caramel


Digg!

Stumble Upon Toolbar

Monday, October 13, 2008

How to Cut Up a Pineapple... Easily


Many people wonder when they buy a pineapple how to cut it. Sometimes it will just sit on the kitchen counter while they are wondering what to do with it now that they have it. Some people wait so long that it goes bad right on the counter, and then they are left still wondering how to cut up a pineapple so they can benefit from fresh pineapple in their dishes. Well, I just follow the directions that come with the pineapple and it is very easy. But what happens if the pineapple doesn't come with the little tag with the directions? Well, you just come here because I am going to tell you how to do it.

First off when choosing a pineapple, make sure it isn't too orange-yellow in color, you want one that is more green than orangy-yellow because that means that it may have already gone bad if you buy it when it is too ripe. Costco is a good place to go when you want one that is just right in ripeness. Ok the directions so you can quit staring at it sitting on the counter:

1. Twist off the top, do not cut it, you could lose some of the yummy flesh if you cut it down too much. It should twist easily when it is ripe enough, if it doesn't twist easily than it isn't ripe enough and you should wait another day.

2. Cut it in half, then into quarters.

3. With each quarter, take a sharp knife and slice out the core.

4. Then slice into wedges. If you are serving it for a party you can leave on the skin as it would look more festive. If you are making it into chunks, then you want to slice off the skin off of each wedge.

Notes:
- If you want pineapple rings, you should invest in a pineapple corer so you can slice, core, and peel a pineapple easily. It makes rings that you can easily have fresh pineapple for that Pineapple Upside Down Cake you have been wanting to make without having to open a can.
- Fresh pineapple tastes better in any desserts, pizza, sweet and sour chicken or pork, and whereever else needs pineapple.
- Much more economical than buying canned pineapple, especially when you get a great deal at the store on fresh pineapples. Costco has the best prices I have found at about $2.99-3.99 each and they have nice big ones.


Digg!

Stumble Upon Toolbar

Sunday, October 12, 2008

Broiled Grapefruit


Some people think this sounds very strange. Well, it isn't. It is very tasty when you add sweet plus a little tart and add heat to it. When you add these things together... you get Broiled Grapefruit, and it is yummy for breakfast! I got it out of my Williams and Sonoma Breakfast and Brunch cookbook and I make it so often, I have that recipe memorized, that is how good it is.

Broiled Grapefruit

2 ruby red grapefruit
1/2 cup brown sugar
1 tsp cinnamon
4 Tbsp butter

Cut the grapefruit in half and then cut around the segments so they will spoon out easily. Melt butter and add the brown sugar and cinnamon to make somewhat of a paste. Put grapefruit halves in baking dish and top each with equal amounts of brown sugar mixture, spread it all over the top of grapefruit. Broil 4 inches from element for about 2-3 minutes or until brown sugar is bubbly and grapefruit is hot.

Notes:
- You can use other types of grapefruit, I just prefer ruby red grapefruit.
- You can adjust the recipe to make more grapefruit halves or fewer, just adjust accordingly.


Digg!

Stumble Upon Toolbar

Banana Pecan French Toast with Caramel Drizzle

You want breakfast? Here is a very tasty decadent breakfast that was fun to make and very easy to do with just a few ingredients. I had the ingredients in the house and just made this up yesterday morning for my hungry family who wanted something just a bit different for breakfast.


Banana Pecan French Toast with Caramel Drizzle

8 slices thick french bread or sourdough
3 eggs
1 cup milk
1/2 tsp vanilla
1/4 cup butter
3 bananas
1 Tbsp lemon juice
1/4 cup pecans, chopped
caramel sauce (I used Smucker's Caramel Sauce Ice Cream Topping for the drizzle
Garnish with whip cream

Beat 3 eggs in a bowl; add milk and vanilla, beat well. Preheat griddle to 375 degrees and spray with cooking spray. Dip both sides of each slice of french toast and put on griddle, cook until golden brown on both sides.

Slice bananas and mix with lemon juice in a bowl (the lemon juice prevents the bananas from turning brown). In a saute pan, melt butter. Add bananas and pecans, saute for about 2 minutes until bananas are hot.

Put french toast on a plate, put some banana/pecan mixture on, drizzle with caramel sauce and then top with whip cream and a few more pecans. Enjoy!


Digg!

Stumble Upon Toolbar

Saturday, October 11, 2008

Apple Pie

Here is an old faithful recipe that people have been making for years and years. Apple pie is about as American as you can get; it goes hand in hand with baseball, hot dogs, and the county fair.

This post comes complete with pastry recipe for the crust, apple filling, and my variation of apple pie I made last weekend which is Caramel Apple Pie with Vanilla Ice Cream. Let your tastebuds run with wild abandon with this pie as you can make it rather quickly and put just about anything with it to make it even better.

APPLE PIE
Crust for 2 crust pie:

2 cups all purpose flour
1/2 tsp salt
2/3 cup shortening
6 to 7 Tbsp ice cold water

In a bowl, stir together flour and salt, cut in shortening till pieces are the size of small peas. Sprinkle 1 Tbsp of water over part of mixture, gently toss with a fork and push to side of bowl. Repeat until all mixture is moistened. Divide dough in half and form each half into a ball.
On lightly floured surface, flatten one ball with your hands. Roll dough from center to edges forming a circle about 12 inches in diameter. Wrap pastry around rolling pin for easy transport to the pie plate, roll out onto pie plate, and trim edges to rin of pie plate.
For top crust, repeat as the bottom crust, cut slits to allow steam to escape when you place top crust onto filling for the pie. Trim top crust 1/2 inch beyond edge of plate so you can pinch edges together for fluted look.

To make a lattice crust, after rolling out top crust, slice into thin strips and weave the strips over and under each other until you get a lattice look and pinch edges together to finish the lattice look. Bake as directed for individual pie recipes. (in this picture, my blackberry pie with lattice crust is shown but it gives you the idea of a lattice pie crust since I did not do this with my apple pie, even though you can do it with apple pie).

Apple Pie Filling:
6 cups apple slices (can use fresh or frozen; when using fresh, it is about 5-7 medium pie apples)
3/4 cup sugar
1 Tbsp flour

Toss apple slices with sugar and flour, fill bottom pie crust. After top crust is placed on pie, place foil around the edges of pie (not the center) to allow even browning since the edges always brown first. Bake in the oven 25 minutes, remove foil and bake an additional 20-25 minutes or until the top is golden brown and fruit is tender. Makes 8 servings. (directions for frozen fruit fillings below)

Notes:
- When using frozen fruit, let filling sit for 15-30 minutes to let the fruit partially thaw but remaining still a bit icy.
- When baking with frozen fruit, cover edges with foil as usual, bake for 50 minutes before taking the foil off then after removing foil bake 20-30 minutes more or until fruit is tender and crust is golden brown.
- To make a nicer brown color, brush on some melted butter or egg wash on top crust.
- You can use a commercial pie crust already prepared if you are not sure about making your own crust, they work well. I have used these when I have to make a lot of pies, it goes faster when making 3 or more pies.
- You can use different fillings with different kinds of fruits. ( I am working on another blog post about different types of fillings but the pie cooking times are about the same, look for that coming soon)

Variation:
Caramel Apple Pie with Vanilla Ice Cream
After pie is baked, serve it with some vanilla ice cream drizzled with caramel sauce as shown in picture below.


Digg!

Stumble Upon Toolbar

Thursday, October 9, 2008

Question About Saving Money

This just came through on the comment to the post about Saving Money on Groceries post and here is the question from sortin'itallout (Grammy's Recipes You have a very nice site by the way):

"I am curious about the coupons--we don't buy a newspaper, so would it make sense to buy a paper just for the coupons? Or is the cost of the paper more than you can save with coupons?"

I would buy at least the Sunday paper each week for all the ads, there is enough ads in most newspapers that can actually pay for your newspaper in addition to saving extra money on your food bill. Most ads in papers are for newer products, old faithful products, and sometimes products that do not sell well. You have to wade through them and find what you will really use and what you need.

If you do not want to go the newspaper route (I find it is one of the more easier ways to get my coupons but not everyone does), there are also websites that you can print free coupons and you can surf those after making your weekly grocery list and check to see if there is a coupon for anything you have on your list and print it out.

Sometimes, there are coupon swapping groups (yes they still exist haha, but they are few and far between) or get some friends together and start one; that way you all benefit. You can possibly find coupon swapping groups within Mom's groups, and places like that online will guide you to a local one in the area, if it exists.

Check the magazines you read. A lot of the recipe, cooking, home and garden magazines are huge with coupons on popular products.

Check your grocery store receipt, sometimes there are coupons on the back and some stores print out coupons at the register. Save these for later and make sure you use them before the expiration date.

Check product websites. Some of the more popular products have huge websites and you can surf them to find coupons, they are large enough to give out massive amounts of coupons because that indicates dollars in their pockets. Here are a couple websites that you can get coupons from:
1. Box Tops for Education These are boxtops that come off of cereal boxes and many more other products from General Mills, they are glad to give away coupons because when you clip these little boxtops and send them to a school that accepts them, they get money but they also give back by giving money to schools when they turn it in. Win Win situation for all. I clip many many boxtops for my daughter's school.
2. Betty Crocker Coupon Page
3. Pillsbury Coupon and Promotion Page
These are just a few of the sites you can get coupons from. All 3 of these individual sites come from General Mills. You can also look up Post, Kellogg's, and whatever else site you can find. If you have the surfing time, you can save a bundle of money on looking on sites of products you use the most.

I hope this was helpful. Let me know what else I can do for you! Thanks for your question.


Digg!

Stumble Upon Toolbar

Easy Cheesy Potatoes

Here is a very simple and filling potato casserole recipe. I got it from Kraft Foods and I didn't realize that 5 little ingredients would make such a huge tasty dish. We had these with my roasted chicken and baked squash last Saturday night for dinner, needless to say, there were no leftovers. So here is the recipe.


Easy Cheesy Potatoes

4 medium potatoes, unpeeled, cut into 1/2" chunks (about 4 cups)
8 oz Velveeta cheese, cut into cubes
1/2 medium onion, chopped (about 1/2 cup)
1/4 cup mayonnaise or miracle whip dressing
4 slices of bacon, cooked, drained and crumbled (about 1/4 cup)

Preheat oven to 400 degrees. Mix all ingredients except bacon and put into greased 8 inch square baking dish (can be sprayed with cooking spray). Sprinkle with bacon. Bake 40-45 minutes or until potatoes are tender.

Notes:
- For lower fat use Velveeta light cheese instead of regular Velveeta
- For extra color, sprinkle 1 Tbsp chopped fresh parsley on top just before serving.


Digg!

Stumble Upon Toolbar

Wednesday, October 8, 2008

Smokies In Lil' Blankies

Here is a very fast, easily satisfying snack for any occasion and they are so easy to make. Kids love these too for quick after school snacks.


Smokies In Lil' Blankies

1 package of refrigerator crescent roll dough
1 package of little smokies (I like the cheese filled smokies)
Assorted Dipping Sauces: honey mustard, ketchup, ranch dip, yellow mustard, BBQ sauce

Preheat oven to 375 degrees. Cut the crescent dough pieces into 4 each. Wrap little smokies around each piece of dough. Bake for 12-15 minutes or until golden brown. Makes 24.

For Crescent Dogs:
Wrap full size hot dogs in each piece of crescent dough and bake 12-15 minutes. Makes 6.


Digg!

Stumble Upon Toolbar

Vegan/Vegetarian Resources

It has been brought to my attention that I am forgetting the vegan/vegetarian people while writing this blog. While that is probably true, it isn't because I am trying to snuff them out or anything. It is because I have no clue how to cook this way as I was not brought up that way. So, for all the vegans and vegetarians, I am concocting this resource page for vegan and vegetarian sites because I do care about everyone as people and respect their choices. Thank you Malica (www.crazedmerlie.blogspot.com)for pointing this out for me from your review on Link Referral.

So, let the list begin. If anyone knows of very good vegan/vegetarian sites, please let me know and I will add them here. Thanks!

1. The Vegetarian's Guide to Dining in Boston MA
2. Vegan Food
3. About.com Vegetarian Recipes
4. Eat Air - A Vegan Food Log
5. Vegan Food: More Than Tofu and Sprouts
6. Vegan Food For Thought
7. The Vegetarian Resource Group Recipes
8. Vegetarian Recipes.org
9. Savvy Vegetarian: Support for your Vegetarian Diet and Lifestyle
10. VegCooking
11. The Vegan Cookbook

Stumble Upon Toolbar

Tuesday, October 7, 2008

Baked Acorn Squash


This is a favorite of the family anytime of the year, especially in the winter. The next time I make squash soup, I will post it now that we are getting into the fall and winter months and I will be doing more soups, stews, and casserole dishes that can easily be frozen for later. These are the types of meals that are great in the crock pot and baked in the oven. The good old fashioned comfort food, it is so nice to have a nice bowl or soup or stew when it is cold and rainy (sometimes snowy) outside. But for now, here is my Baked Acorn Squash, so easy that anyone could do this.

Baked Acorn Squash

1 acorn squash, seeds scooped out, quartered
1/2 cup brown sugar
4 Tbsp butter or margarine
1/4 cup water

Remove seeds and cut into quarters. Preheat oven to 400 degrees. In a large baking dish, put in the squash quarters flesh side up. Put 1 Tbsp of butter or margarine on each piece of squash, then divide the brown sugar 4 ways and put equal amounts on top of each squash piece with the butter. Pour the water into the casserole dish. Bake 40 minutes or until squash is fork tender. Serve.


Digg!

Stumble Upon Toolbar

Strawberry-Banana Breakfast Milkshake


Kids love milkshakes, they do not always like to eat breakfast. My kids are no different, sometimes a healthy milkshake is a good breakfast when they are on the go. Before sports activities is also a good time for a healthy milkshake as my daughter loves to have one before she goes to Tae Kwon Do class or any other physical activity.

This is a very versatile recipe as you can use any kind of fruit and any kind of yogurt. The wheat germ adds some vitamins, the banana adds protein, and if you are using blueberries instead; it adds a lot of antioxidants. I have the pickiest 3 year old on the planet and she even likes these (and she doesn't like anything, it is so hard to cook for her). Here is what I throw together in a blender for this recipe.

Strawberry-Banana Breakfast Milkshake

1 cup 2% milk
1 container vanilla or strawberry yogurt
1 banana
1/2 cup fresh or frozen strawberries
1 Tbsp honey
1/4 cup wheat germ (optional)

Mix all ingredients in a blender and blend well, serve in a tall glass with a straw.

Notes:
- Substitute any fruit for the strawberries and bananas
- Substitute any yogurt for the vanilla or strawberry
- Make this thicker by using less milk and serve in a parfait cup topped with granola and more whole fruit for a tasty parfait treat.


Digg!

Stumble Upon Toolbar

Gameday Chicken Wings


When we watch football, I cannot forget chicken wings. The whole family loves to munch on chicken wings during the big game. I have concocted my own wing rub recipe for my chicken wings that is so yummy and it goes with any type of dipping sauce or is just great by themselves. Here is my version of chicken wings complete with the wing rub recipe and my recommended dipping sauces. Be sure to have lots of napkins on hand, as these can get messy!

Gameday Chicken Wings

WING RUB: (the picture below is what your rub should look like after it is mixed)
1 1/3 cups brown sugar
1/4 cup coarse salt
1/4 cup paprika
2 Tbsp seasoned salt
2 tsp dry mustard
2 tsp granulated garlic or 1 clove garlic that is minced and pressed (if using fresh garlic do not add it to the dry ingredients, add it to the shaker bag with the rub when you coat the chicken wings)
2 tsp chili powder
1 tsp onion salt
1 tsp black pepper
1/4 - 1/2 tsp cayenne pepper (depending on how hot you like your wings)
1 tsp hickory flavored liquid smoke (optional)

CHICKEN WINGS
2-4 lbs chicken wings (thawed if you are using frozen wings)


Mix dry ingredients except liquid smoke (and fresh garlic, do not mix with dry ingredients). Put chicken wings in large plastic bag with 1 cup of rub and shake to coat. Add liquid smoke and fresh garlic if you are using fresh garlic and shake again. Refrigerate minimum 24 hours and maximum 48 hours).

Preheat oven to 350 degrees. Make a single layer in baking dish or cookie sheet; bake 1 hour or until done.

Crock Pot directions: After coating with rub and refrigerating, put in crock pot; turn on low for 4-6 hours and on high for 2-3 hours.

Notes:
- I recommend baking so they do not fall off the bone while trying to eat and dip, if you do not care, the crock pot makes very tender wings.
- Dipping sauce can be used; I recommend BBQ sauce (homemade is better; here is the link to my own BBQ sauce in this site Dips, Sauces, and Condiments and scroll down until you come to the homemade BBQ sauce recipe), ranch dip, blue cheese dressing, or honey mustard sauce.
- Store extra rub in airtight container in a dry cool place, or in a ziplock storage bag clearly labeled

The dipping sauce we used is a purchased sauce (I do not do that often at all unless the sauce tastes very good). We got it when we went to the fair and the wing sauce is to die for! It is called Honey Habanero Wing Sauce made by The James Gang BBQ Company and they have so many products that look good, it was a hard choice. Richard (my husband) is the sauce whiz and he is very picky about sauce but he liked these so we bought some to give them a try. In the box he bought we got 1 bottle of the Honey Habanero Wing Sauce (spicy but with a nice sweet bite to it), Spiced Rum Steak Marinade, and their original Hickory Smoke BBQ sauce (we got 2 bottles of that, it is very good). If you do not make your own sauce, I highly recommend buying this sauce. I usually make my own, but this is a good one to buy. One more little tidbit about this sauce, we looked at the labels of the sauce and we did not find any high fructose corn syrup in any of them, just fresh ingredients and it tastes so good. Give them a try!


Digg!

Stumble Upon Toolbar

Monday, October 6, 2008

Herb Roasted Chicken

(pictured here is Plain Herb Roasted Chicken and the variation is below the lemon recipe)

Lemon Herb Roasted Chicken
(there is another 2 variations at the bottom for different flavors with this chicken)

1 chicken (about 2 1/2 to 3 lb whole chicken)
1/2 stick margarine or butter, softened
2 Tbsp coarse salt
1 clove garlic, minced or pressed
1 Tbsp chopped parsley
1 tsp thyme
1 tsp lemon pepper
1 tsp poultry seasoning or sage
1/4 cup water with 1 Tbsp lemon juice added
1 lemon cut into slices

Preheat oven to 325 degrees. Rub the chicken with coarse salt (including inside the cavity).

Combine the butter, garlic, parsley, thyme, lemon pepper, poultry seasoning or sage until creamy. Spread all over chicken including under the skin on the breast. Put into baking dish. Put the water with lemon juice in the bottom of the baking dish to help keep chicken moist while cooking and for basting later in cooking. Slice lemon and place slices randomly on chicken and inside the cavity.

Put in preheated oven for 2 hours, basting after the first hour. Tent the chicken so the top doesn't brown too quickly. After the 2 hours, increase the temperature to 400 degrees and bake for another 40 minutes, basting every 10 minutes until meat thermometer inserted in breast comes to 165 degrees for an internal temperature.

Variations:
1. Plain Herb Roasted Chicken (like in the picture since my husband doesn't like lemon like I do, I fix the lemon when he is not home): Just substitute black pepper for lemon pepper and omit the lemon juice from the water, and the lemon slices.
2. Apple Herb Roasted Chicken: Substitute black pepper for the lemon pepper; substitute apple juice for the lemon juice, and place apple slices around the chicken. (Granny Smith apples would be my apple of choice for this way to make this chicken because the sweet and tart of the apple goes well with the savory herbs)


Digg!

Stumble Upon Toolbar

Answering a Question About Pumpkin Cake

Here is a question that I recently received about the Pumpkin Raisin Cake.

"Do you think reducing the amount of oil, would make it drier?"

You know, I really do not know. I have never reduced the amount because I like a really moist cake. If I was going to reduce the amount of oil, I would maybe try 1/2 cup and see how that went. It is possible it would be drier but I really do not know as I have never tried it. I am sorry I cannot answer this question fully, but I would just say try it and let me know how it goes.

Another suggestion that I just got from a friend who knows about my pumpkin cake is that she would reduce the oil to 1/2 cup and the eggs from 4 to 2 eggs and maybe that would make it more like a regular cake rather than so moist like this cake. Worth a try. Let me know how it goes if you decide to try it.

Stumble Upon Toolbar

Spinach Dip in a Sourdough Bread Bowl

This is a dip or spread that is great for any occasion and we love it! It is Knorr's Spinach Dip and I have prepared it and put it into a sourdough bread bowl. You can also go to their site at Let's Make Knorr Recipes for more great recipes with their soup and dip mixes. We had this on Sunday for the football game with crackers and sourdough bread slices. (we will not discuss the beating the Seahawks got from the Giants...). So without further ado, let's make some spinach dip.


Knorr Spinach Dip

1 package (10 oz) baby spinach, chopped OR 1 package (10 oz) frozen spinach, thawed and squeezed dry
1 container (16 oz) sour cream
1 cup mayonnaise
1 package Knorr Vegetable recipe mix
1 can (8 oz) water chestnuts, drained and chopped (optional)
3 green onions, chopped (optional)

Combine all ingredients and chill about 2 hours. Serve with your favorite dippers.

Notes:
- You can hollow out a unsliced sourdough round to make a lovely bread bowl that is yummy to eat but also makes a nice serving idea for parties.
- This can also be used as a spread on sandwiches with your favorite luncheon meats and cheeses to give a little extra zip along with getting a serving of vegetables with the spinach in the dip.
- Water chestnuts give the dip an extra crunch against the creamy texture which makes it even better, but if you do not like water chestnuts you can omit them.

Other add ins:
1. Shredded cheddar cheese
2. Chopped olives
3. Chopped sweet red pepper

Favorite Dippers:
1. We used Ritz crackers, but you can also use basically any favorite cracker
2. Crostini
3. Sourdough bread from the hollowed out bread bowl
4. Assorted fresh raw vegetables


Digg!

Stumble Upon Toolbar

Sunday, October 5, 2008

Pumpkin Raisin Cake with Cream Cheese Frosting

Here is a great dessert for fall when pumpkin recipes are getting into full swing. I love this cake since it is so moist and yummy! You will notice in the picture that it is falling apart when I cut it; that is because it is so moist and a good part of that is because of the vegetable oil and the fact that you will not forget to sift the dry ingredients as that makes your cake lighter, fluffier, and more moist.


Pumpkin Raisin Cake

4 eggs
2 cups sugar
1 cup vegetable oil
1 can (16 oz) pumpkin
2 cups all purpose flour
2 tsp baking powder
2 tsp ground cinnamon
1 tsp baking soda
1/2 tsp salt
1/2 tsp ground ginger
1/2 tsp ground cloves
1 cup raisins
nutmeg sprinkle for the top if desired
(cream cheese frosting recipe follows after cake directions)

Heat oven to 350 degrees. Grease 13x8 long baking dish. Beat eggs, sugar, oil, and pumpkin in a large bowl. Sift together flour, baking powder, cinnamon, baking soda, salt, ginger, and cloves into pumpkin mixture. Mix well; stir in raisins.

Pour batter into the baking dish. Bake 40-45 minutes or until toothpick inserted in center comes out clean. Cool completely. Frost with cream cheese frosting, recipe follows. After frosting, lightly sprinkle nutmeg on top if desired.

Cream Cheese Frosting

3 oz cream cheese, softened
1/3 cup margarine or butter, softened
1 tsp vanilla
2 cups powdered sugar

Beat cream cheese, margarine, and vanilla in medium bowl on low speed until smooth. Gradually beat in powdered sugar until smooth and good spreading consistency. Frost pumpkin cake when cake is cooled completely.

Notes:
Make sure you sift the dry ingredients with either a dry ingredient sifter or you can use a fine mesh strainer. As you can see by the blue product links, I recommend the Oxo brand for kitchen gadgets because they are one of the best quality products I own, my store has many other brands but I recommend what I use myself at home.


Digg!

Stumble Upon Toolbar

Homemade Cinnamon Applesauce


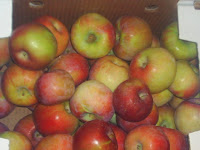
Last weekend I made applesauce, and it is so good! I made a cinnamon applesauce that my family loves. My daughter and I went to Farmer's Market and bought 3 boxes of apples which turned out to be about 63 lbs (we went a tad over the 20 lb a box weight) and this many apples made me 8 pints of apple butter, 1 large bag of frozen apple pie slices (of which I am making apple pie soon), 14 quarts and 4 pints of applesauce. We have enough for quite a while and it will save me money at the store from not having to buy jars of commercial applesauce and this is better for my family anyway.

The apples I used is a combination of McIntosh and Cortland apples locally grown here. The McIntosh gives the sweetness while the Cortland gives the tart tang and it is a great cooking apple, that is what I used for pie slices that I froze. Apples that are not recommended for making applesauce is Red Delicious and Golden Delicious because they are just too grainy for applesauce. You want a firm apple that is crispy and sort of tart. Granny Smiths are also great for applesauce and especially pies.

With this recipe, it is the basic recipe and depending on how many pounds of apples you have, you want to adjust the amounts of the other ingredients of course. I ended up using about 40 lbs of apples for applesauce so adjusted accordingly. So, basically to make this recipe with 40 lbs of apples, I just used 5 times the amounts listed here. This is also a great recipe if you just want to freeze it in plastic freezer containers, the freezing instructions are at the bottom.

Homemade Cinnamon Applesauce

8 lbs of cooking apples, cored and quartered (about 24 cups)
2 cups water or apple juice
4 Tbsp cinnamon
1 to 1 1/2 cups sugar

In a 8-10 quart kettle, combine apples, water or apple juice, and cinnamon. Bring to a boil, reduce heat. Simmer, covered for about 15-20 minutes, stirring often. Press apples through a food mill or sieve. Return pulp to kettle and stir in sugar. If necessary, add 1/2 to 1 cup water for desired consistency. Bring to a boil. Makes 6 pints. (24 half cup servings). {This is what it should look like in the steps. The first picture is when I first put the apple pieces on the stove and the second picture is the applesauce after I used the potato masher to mash it to my favorite chunky consistency. Note the difference in a short amount of time, apples cook down quite a bit which is why you need a lot of apples to make applesauce for the whole year}.


Boiling Water Canning Method: Ladle hot sauce into hot, sterilized jars, leaving 1/2 inch headspace. Adjust lids. Process in boiling water bath for 15 minutes for pints and 20 minutes for quarts.

Freezing: Cool applesauce. Spoon into freezer containers, leaving about 1/2 inch to 1 inch headspace to allow for expanding of applesauce when freezing. Seal, label, and freeze.

Notes:
1. You can substitute 1/3 cup of red hot candies for the cinnamon per batch and it gives it a nice rosey color and the cinnamon flavor.
2. You can use a potato masher instead of a food mill to get the applesauce to desired consistency, I like chunky applesauce so I use the potato masher method instead of a food mill. The food mill leaves the applesauce smooth.
3. You can put the cut and cored apples into a solution of 1 gallon of water, 2 Tbsp vinegar or apple cider vinegar, and 2 Tbsp salt to prevent browning but for applesauce this is not necessary, but you would do it for freezing apple slices.


Digg!

Stumble Upon Toolbar

Friday, October 3, 2008

The Cupcake Story


A couple weeks ago, I embarked on a project with my daughters because we wanted something sweet to eat. We chose to make up some cupcakes; I had bought a mix (gosh forbid, I did not make them homemade! Oh the shame! haha) initially for making cupcakes for a school function but I can always buy another mix (or make them homemade) the closer it gets to the school function.

I let them measure everything out and mix it themselves. Nessa filled the muffin tins with the paper liners, she is very proud of that as you can see here. She would not let anyone touch the cupcake liners and her famous phrase was "Back Off Jack!". She is a funny girl, I still cannot believe some of the comments that come out of her mouth.

Finally, when they were done baking and cooling, it was time to frost. Kids + Frosting = HUGE MESS;(sure wish I could snap pictures of the mess we had before it was cleaned up, I just thought of why I did not do that, I guess hindsight is 20/20) but it is an equation that was well worth the picture effort. They really enjoyed themselves; it was a great project for us for some great quality time and gave them a treat too. Other than Nessa's snide comments when anyone got too close to "her" cupcakes, it was a lot of fun. Except now I need to train them to clean up their mess... they still get Mom to do it!

This is Nessa licking the beaters, it is the fun part of baking.

Nicole loves to frost cupcakes.

Nessa ate more than she frosted, which goes with the territory with being 3 yrs old. This is how she normally eats cupcakes and these were so moist that we had a huge mess every time she wanted to eat a cupcake. Oh well, that is what happens with kiddos. Good thing they wash well.

Stumble Upon Toolbar