Sunday, August 31, 2008

Beets! They are good for you!

Out of the Garden (photo credit: http://outofthegarden.wordpress.com/2006/09/24/beets-and-greens-pachadi/

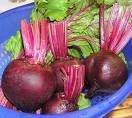
Today I made pickled beets. It was alot of fun and we got 14 pints and 2 quarts (I wasn't planning on any quarts but when I had a bunch left, I had to quick wash a couple jars and all I had was quart jars left). Now we have pickled beets for the next year, YAY! The whole family loves them.

But, why eat beets? They are so nutritious and good for you. They have a detoxifying effect on the body and have huge amounts of folate. A body needs folate for a healthy cardiovascular system and it helps a pregnant woman have healthy fetal development (among the many things that promote healthy fetal development).

Beets also have cancer fighting agents (especially for colon cancer) and anti-inflammatory agents that help both of these affilictions among other great health benefits. I have put the link to the article I read about this in at the bottom if anyone would like to read more.

I love beets! They are great boiled with butter, pickled (as I did tonight), and made into soup. Russian people make a beet soup called Borscht and it is really good. I should experiment and find a good Borscht recipe to add here. You eat it cold and put sour cream on it (that is how I have had it anyway and was told that is how it is served, if that is not how it is usually served, please let me know, and post your serving suggestion for this wonderful soup).

They are hearty vegetables grown in spring and fall (they like a cooler temperature) and one of few tuber vegetables that you can eat the leaves too. Beet greens were never my forte'; however, they are also good for you and like spinach, very high in iron. They are easy to grow in the garden, but since I do not have a garden (I live in an apartment, there is no room here)I usually buy them at Farmer's Market here in Olympia. If anyone is reading from Olympia or Thurston County Washington; then go to Farmer's Market and go to The Wobbly Cart and their beets are the best I have had. They have very few blemishes if any and they hold up really well to pickling since when they harvest them, they have just the right amount of ripeness.

I will have pictures and a fantastic recipe for my pickled beets tomorrow, since its almost 1 am now (Pacific time) and I have to get up for work tomorrow so after I get home tomorrow evening, I will have pictures from my canning day and the recipe for my pickled beets.


RESEARCH CREDIT:
http://nutrition.about.com/od/fruitsandvegetables/p/beets.htm
http://www.whfoods.com/genpage.php?tname=foodspice&dbid=49


Digg!

Stumble Upon Toolbar

Friday, August 29, 2008

Salmon Dip

As it is known, my husband lives for salmon fishing. So, when he goes fishing and catches fish, another thing I make that the family loves is salmon dip. Put it on Ritz crackers or any other cracker and it makes a wonderful snack. Here is my recipe:

Salmon Dip

1 lb smoked salmon or 1 16 oz can of salmon (if you do not have freshed smoked salmon available)
1 6 oz package cream cheese
2 Tbsp sour cream
2 Tbsp mayonnaise
1/4 tsp cayenne pepper (can be omitted if you don't like the extra kick)
1 tsp worcestershire sauce
1/4 tsp salt
1 Tbsp lemon juice
1 tsp chopped parsley
1/4 tsp garlic salt

Chop smoked salmon finely or drain can of salmon. Add all ingredients to a bowl or food processor. Mix until smooth. (use a bowl if you want your dip chunky, use a food processor if you want your dip smooth) Refrigerate till served.
*You may omit the garlic salt and use 1/2 clove minced fresh garlic instead if desired*
*You can also add another 6 oz cream cheese if you want it stiffer in case you want to make a salmon dip ball, to use for parties; makes it easier to mold for a salmon dip ball*

This is awesome on crackers, bagels, or make it into a festive ball for parties (that's another post as we get closer to the holidays, when I bring on all the holiday treats and tips and tricks)


Digg!

Stumble Upon Toolbar

Wednesday, August 27, 2008

Grandma's Hobo Bread


This is an interesting recipe that I got from my grandma. She is one of the most wonderful cooks in the world. At almost 93 years old, she is still going in the kitchen; just a little slower than she used to. (that's a joke, haha)

(update: Sept 19, 2008: my grandma died last week 9-11-08 after a bout with cancer that took her life, I just wanted to remember her through her cooking, she was a wonderful woman and a very good cook. Please remember Audrey Rose Stewart if you make this recipe; she was 93 yrs old; RIP 9-3-1915 - 9-11-2008. Thank you)

One recipe that has stuck in my mind as one of her best is so simple, yet so yummy. I remember when we lived almost right next door to her growing up that when we would get home from school, she would give us a slice of this bread with some butter or peanut butter on it for a snack. If you like raisins, you will love this.

But, you do need at least 2-3 one pound empty coffee cans to make this bread. Coffee cans are used to bake this bread instead of the usual bread pans. It has to be a metal coffee can; since plastic will melt in the oven anyway.

Why does she call this Hobo Bread? I have no idea, I just know it is good.

Hobo Bread

2 cups raisins
4 tsp baking soda
2 1/2 cups boiling water

Soak 6-8 hours or overnight. In this photo, you can see when we put the water into the raisin/baking soda mixture, that it started to fizz or bubble. This is perfectly normal and it is supposed to do that.

After the soaking period add:
1 cup brown sugar
1 cup granulatd sugar
4 cups flour
4 Tbsp vegetable oil
1/2 tsp salt

Mix well and divide between one pound coffee cans; filling about 2/3 of the way full.(Any fuller and the batter will overflow and you will have a huge mess in the oven.Grease inside of can with shortning, liberally. Bake one hour at 350 degrees on a cookie sheet. Let stand in can 1/2 hour before inverting to remove the bread. Cool on wire racks.


I know this would be good with butter or peanut butter. And, I wonder how it would be with cream cheese... hmmmm if anyone wants to try this, please comment me back on how it is with cream cheese.

One thing I do not suggest however is to use coffee cans bigger than one pound size, it does not work! Grandma tried it years ago to make more for us to eat and it just came out mush, so just stick with the smaller cans.


Digg!

Stumble Upon Toolbar

Saving Money On Your Grocery Bill: My Top 10 Tips

Photobucket (photo credit: http://moms-life.com/more-ways-to-save-money/)

Everyone wants to save money on their grocery bill. I know I sure do. Here is my tips on saving money that works for me. (Disclaimer: This may not work for everyone, I am just putting what I do out there in case anyone wants to try it). Try my Top 10 Tips and let me know how much you save! I can usually save between $50-70 per week.

1. Plan meals ahead. Make a list of what meals you want to fix during the week and stick to it! Make a plan A and plan B in case something you have planned each night is not what everyone wants to eat. I call it the Just In Case meal. Buy only the things you need for the meals, and maybe breakfast and lunch foods. You can make healthy snacks for the kids rather than buying everything packaged. My kids always want fruit, celery with peanut butter, or carrots for snacks; and they can be inexpensive if you find a good sale or go to Farmer's Market or a co-op.

2. If you can get away with it; DO NOT take the husband or the children with you. They tend to want things and try to sneak things into the cart that may not be on your list. Instead, ask them before you leave if there is anything they might want and try to accomodate them according to the list you have prepared.

3. Eat before you go into the store. You tend to buy more when you go hungry.

4. If you have a store that honors other store flyers, go there. Chances are if you do your homework and find out where everything you need is on sale, then you can save even more in one store when you bring all your flyers with you. Such as the case of Walmart, they honor other competing stores sale prices as long as you have your flyers with you.

5. Keep your eagle eyes out for coupons. If it is a coupon for things you always use, then by all means get that savings. There is no shame in clipping coupons despite what some folks think. (I have had other people roll their eyes at me at the store because I pull out all my coupons and flyers and take forever in line, but I do not care because that is money going back into my pocket).


Photobucket (photo credit:http://freeprintablecoupons.blogspot.com/2006/10/counpons.html)

6. Get a membership to a food co-op. You pay a yearly fee and your produce is at just picked freshness and you pay alot less per pound.


Photobucket (photo credit to www.gallatinvalleyfoodbank.org/calendar.cfm)

7. Frequent the Farmer's Market. Get to know your local growers on a personal level and sometimes they are willing to cut you deals since you are a regular customer.


Photobucket (photo credit: www.boistfortvalleyfarm.com/markets.php)


This photo is actually our Farmer's Market here in Olympia. I love to shop here!

8. Learn how to can and preserve food. You buy in bulk in the summer/fall and preserve it, then you have that food all year long and do not have to buy it every week at the store. I do this with pears, peaches, beets, pickles, and other fruits and vegetables. Canning cookbooks will tell you what is cannable (don't know if that is a word, but it works for me) and what is not. Then you will know if you should buy it in bulk or not.

9. Invest in a food vacuum packer (otherwise called The Food Saver; that way you can buy family packs and repackage them to freeze.

10. Buy meat in bulk family packs; they are usually 10-20 cents cheaper per pound and then you just refer to #9 above about The Food Saver

I have more tips but those are my Top 10. If anyone would like anymore tips, leave me a comment and I will post some more!


Digg!


Stumble Upon Toolbar

Tuesday, August 26, 2008

Hubby's Favorite Salmon

Here is an interesting recipe. It is my husband's favorite salmon recipe and we all love it. I also forgot about it and when he put it on his fishing blog (www.fishingaddictblog.blogspot.com), that is what made me remember it. We have this every time he goes salmon fishing and catches something (we love it when he catches fish).

This dish is made on a cedar plank and it really adds flavor to the food if you have not tried it. Planks also come in alder wood. It is his favorite cooking tool in the world and he does it on the grill outside. Just follow his recipe and you will have exquisite cedar planked salmon that is to die for!!

Photobucket
Photo Credit to: http://www.wholefoodsmarket.com/recipes/seafood/salmon_cedarplank.html


ROASTED CEDAR PLANK SALMON

2 LBS. SALMON FILLET
3 TBLSPN VEGETABLE OIL
1 1/2 TBLSPN SOY SAUCE
1 1/2 tsp. CHOPPED GARLIC
1/2 tspn. SALT
1/4 tsp. WHITE PEPPER
1/3 CUP RYE OR SCOTCH WHISKY
1 TBLSPN BROWN SUGAR

SERVES 4-6

PLACE SALMON FILLET IN A LONG SHALLOW DISH. MIX TOGETHER ALL THE INGREDIENTS AND POUR OVER THE SALMON FILLET. MARINATE FOR 1/2 HOUR.

PRE-HEAT OVEN OR GRILL TO 400 DEGREES. PLACE CEDAR PLANK DIRECTLY ON RACK AND BAKE FOR 8-10 MINUTES. THIS WILL LIGHTLY ROAST THE WOOD. REMOVE PLANK FROM THE OVEN OR GRILL AND RUB WITH A THIN COATING OF OLIVE OIL ON PLANK WHILE IT IS STILL HOT. PLACE SALMON DIRECTLY ON THE HOT PLANK AND ROAST ON PLANK FOR ABOUT 10-15 MINUTES AND BE SURE TO KEEP A SPRAY BOTTLE WITH WATER NEAR BY IF USING OUTDOOR GRILL TO COOK THE SALMON SO IF THE PLANK CATCHES FIRE YOU HAVE SOME WATER TO PUT OUT THE FLAME.


Digg!

Stumble Upon Toolbar

Fun With Cakes (Part 2)

What has the consistency of PlayDoh and tastes like Starburst candy?

Give up?

It is called Candy Clay and I usually get mine at Joanne's Craft Store (formerly Joanne's Fabric Store) or you can get it at anyplace that sells an extensive stock of cake decorating supplies.

This is the picture I took of the cake I used it for a while back. My daughter Nessa had her first birthday cake and this is called the Bear Frolicking in the Meadow cake.

Photobucket

You can make any decoration with this Candy Clay simply by rolling and cutting it either with cookie cutters or freehand (if you are that talented) with an exacto knife. If you cut with just any knife, you could stretch it out of shape and ruin your design; so, you need a very sharp knife to cut intricate details to make any cake or cupcake look fantastic.

The flowers, sun, ladybug, and butterflies are all cut from candy clay. The flower cookie cutters were what I used to cut out the flowers, and I cut the rest out freehand just as I thought about what I wanted on her cake. It takes a bit of time to roll and cut, but hey, if it is for a special occasion cake than who cares, it was well worth the effort when she saw the cake. Not to mention, the ohhhs and ahhhs of the guests who thought I bought the decorations like that and just put them on. Much to their surprise when I told them I made them.

Candy Clay can be used for anything you need. Cakes for any occasion, school cupcakes, bake sale items (it adds pop so that it sells well), or cookies and even candy can be decorated with Candy Clay. And, it tastes good; I had a hard time not eating the clay while I was making the decorations. You can get it in other colors as well other than primary colors. They even sell black and white for over the hill cakes. Which gives me an idea for a cake for my mother-in-law for next year!


Digg!

Stumble Upon Toolbar

Monday, August 25, 2008

Honey Walnut Prawns

I had a request from another webmaster at Link Referral about a recipe that we love for prawns. This is the one that stood out to me most as it is one of our most favorite recipes. When we make homemade Chinese food, this is what we have also. It is similar to tempura and oh so yummy!! Here it is:

Honey Walnut Prawns

1 lb of large or medium shrimp, peeled and deveined
1/2 cup walnuts
5 cups water
1 cup sugar
2 cups oil
1/2 cup cornstarch
1/2 cup egg whites
2 Tbsp honey
3 Tbsp mayonnaise
1 Tbsp fresh lemon juice
1/2 Tbsp sweetened condensed milk
1/2 cup oil

PREPARATION

Rinse walnuts, then boil in 5 cups of water, continually changing water until clear. When clear, boil with sugar until sugar dissolves. Heat 2 cups of oil until almost smoking, then deep fry walnuts until they are shiny and brown, no longer golden. Place walnuts on cookie sheet, let cool.

Mix cornstarch and egg whites together to form a thick, sticky texture and mix well with shrimp. Set aside. Mix honey, mayonnaise, lemon juice, and condensed milk in a medium bowl until smooth. Heat oil until boiling, then deep fry shrimp until golden brown. Drain. Fold in honey/mayonnaise mixture. Mix well, sprinkle with walnuts, and arrange on platter.

Recipe courtesy of About.com, Inc; 2005

This isn't the time saver recipe that I am used to but it tastes so good that it is worth the effort. The whole family loves this shrimp with some stir fry, or sweet and sour chicken, or whatever Asian food you like can be the main meal with this recipe.


Digg!

Stumble Upon Toolbar

Sunday, August 24, 2008

Simple Syrup

Here is the recipe for the simple syrup for canning fruit.

Light Syrup needs 4 cups water/or juice and 2 cups of sugar
Medium syrup is 4 cups of water/or juice and 3 cups sugar
Heavy syrup is 4 cups water/or juice to 4 3/4 cups sugar

I always use the light syrup for my fruit, it doesn't need any more sweetness than that. Unless of course you are a sweet freak and need the heavy syrup with your fruit, but since fruit has so much natural sugar; light syrup (to me) tastes the best.

Fun Facts of our canning experience on Aug. 23, 2008:

We used 52 lbs of pears to get 24 pints and 12 quarts
We used about 40 cups of water and 20 cups of sugar for simple syrup
It took us almost 10 hours to can it all from start to finish.
Cost us $38 for all the pears and $6 for the sugar
We have enough pears for the next year.

Last but not least, we had tons of fun!!!


Digg!

Stumble Upon Toolbar

Pear-a-dise

Well, yesterday my oldest daughter (Nicole) and I canned our pears. I thought it was time for her to learn how to help me do some canning this year. She is 9 yrs old and loves to help in the kitchen. She did very well for her first time helping. We had 52 lbs of pears that we picked up from Farmer's Market for less than $40 (cheaper than they were last year). The end result was 24 pints and 12 quarts which will last us a good year. However, I highly recommend getting a peeler for the pears; I had forgot to go buy a new peeler and had to do it the old fashioned way and have many blisters on my hands where I was holding the paring knife today. Ouch! (imagine my difficulties today at work trying to run my cash register and having the blisters on my typing/button pushing hand LOL) This is the one I would recommend by way of fruit/vegetable peelers. A small investment to make the whole canning pears or making applesauce much easier by not having to pare the apples/pears yourself.

Here are some pictures of the process we did yesterday (it took us most of the day and I finally finished about 11:00 pm last night (pacific time); we started around 2:00 pm. It was a long day, but we had alot of fun. Enjoy the pictures and I will insert some tips along the way to help make this easier for anyone who wants to learn.

First, you have to be very organized for the whole canning process to go smoothly. Look in the way back of the picture (just past me in the picture), we have an assembly line going on; it is very important to set up your assembly line BEFORE you start peeling or paring or cutting anything and make sure everything is ready to go before starting. (we have a very small kitchen as you can see, and so we have to maximize every bit of space or it would never work for us) First we have the box of pears (you want firm fruit because it processed in the hot water bath, they soften and if the fruit is too ripe then it will become very mushy and thats not good) that I will be paring and washing; then I hand it off to my daughter to take the cores out and cut into slices; then she will put it in the bath (which is the big metal bowl filled with 1 gallon water, 2 Tb salt and 2 Tb of vinegar; the solution in which the pears will be dipped in so they do not turn brown), then from there you keep the jars hot in the dishwasher so you are raw packing (raw packing is when you put them into the jars without blanching first) them into hot jars to put the simple syrup in it (*recipe for simple syrup coming up later), then fill jars with simple syrup, then place lids and screw caps, and finally in the canner they go. Anyway here are the pictures.

PhotobucketOur beginning assembly line.


Photobucket Nicole is the master corer/slicer in this one while she was filling the jars with pears.


Photobucket Filling jars with simple syrup.


Photobucket Into the canner they go. 6 quarts per batch so your boiling water doesn't overflow, 7 pints per batch can be processed each batch. And yes, the clock was PM time, it was 10:50 at the time we put our last batch in, we were tired LOL


Photobucket Using the jar lifter to get the jars out. They look like huge tongs but a very handy tool.


Photobucket 24 pints are done here.


Photobucket They sure have nice color. Comes from giving them a bath to make them not brown, and adding 1/4 tsp of Fruit Fresh to each jar before syrup. They will hold their color for the next year.

We had a great time canning this and it was great mom/daughter time.


Digg!

Stumble Upon Toolbar

Saturday, August 23, 2008

Cake Batter Bandit

Ok this is just a funny story that I remembered from about a year and a half ago. I call it the Cake Batter Bandit.

My youngest daughter always wants to help in the kitchen, so she pulls her chair up to the side of the counter and "helps" (if you have a toddler or had a toddler, you know how much they really help LOL). Anyway, I was making a cake for my husband's birthday and it was getting ready to put in the oven. She always wanted to stick her fingers in the batter and I kept having to catch her in the act and tell her no, not now. So in these few pictures you can see how she thought she was getting away with being the Cake Batter Bandit. (You can't tell she was guilty with all the cake batter around her mouth, when I kept asking her if she was eating cake batter, she kept saying "no mommy" yeah right LOL)

First she was looking at me and thinking "who me? no I am not going for the batter, I am just watching it for you"

Photobucket

Then as I turned around to grab the camera (I knew she was going to keep trying and it was starting to get cute because I was like oh well no harm in a little cake batter); she did exactly what I thought she would do. She went for the batter knowing my back was turned and dipped a huge fingerful.

Photobucket

When she realized that she was busted, she gives me the sweet innocent face that only a mother can love (and everyone else as well I think) that I had to just laugh and save that story for later when I can use it to embarrass her as a teenager or something cool like that LOL

Photobucket

Just thought I would share her first funny experience while trying to help cook. Afterall, this blog is about cooking.


Digg!

Stumble Upon Toolbar

Fun With Cakes Part 1 (continuation of chocolate base)

Ok to go with the chocolate base idea, this picture is what my middle daughter would like for her birthday this year. It is a castle cake and I am going to attempt to make it for her. (attempt is the operative word here, I mean I can build but this is going to be tricky) After all, you only turn 10 once, right?

Photobucket

Photo courtesy of 2008 Wilton Industries, Inc.

This one I am going to build on a white chocolate base. Same idea as a brown chocolate base, only you buy white chocolate almond bark. Harden it as described in last post, and place on top of cake and start building.

Only thing is with this cake (I have already started planning because her birthday is Dec 31 but it will take time and effort so plan early with a big project so that hopefully it turns out right for the special day). With this cake, they say to use fondant, but since it isn't the best tasting substance in the world (trust me, it isn't LOL) then I am going to have to modify using more edible substances. So I am going to make it out of chocolate and just build it on top of the base on top of a cake and the kids can just eat the castle (talk about a sugar high there LOL)

For the towers, I am envisioning sugar cones then frost them the right color, and I have started figuring out how big I want it and I am using thin cardboard to make patterns for the cake so I can cut out the chocolate and then use royal icing to paste it together.

The great thing about being able to make cakes like this is that if you go to www.wilton.com, they have all the ideas with detailed instructions so that even the most inexperienced decorators can make these. If you can follow a recipe and instructions, then there is no limit to what you can do. So wish me luck on this latest endeavour and if it turns out right there will be pictures of it coming probably January (after her birthday anyway).

Update: I didn't get a chance to get the castle cake planned and shaped the way I wanted since I couldn't get my hands on the appropriate tubes for castle towers and some other tools so she chose her second choice of Hannah Montana Cake. That is in post called Fun with Cakes 6.


Digg!

Stumble Upon Toolbar

Fun With Cakes (Part 1)

Remember when you were a kid and your mom made the most wonderful cakes? Me too! I loved it when my mom made cakes for my birthday, so I make them for my kids also. I love to decorate cakes and sometimes I even decorate for other people when I am asked, if I have time of course.

This post I am going to focus on what is called a chocolate base. Where I got that idea is from when I agreed to create a motorcycle track cake for my friend's son's birthday party. The only problem was that I didn't have time to bake a cake myself since she lives 3 hours away, so I had her get the next most logical solution for a cake... Costco cake (we know how good those are! yummy!) anyway, (yeah I know its cheating when you do not bake it yourself, but oh well, sometimes you gotta do what you gotta do).

Photobucket


What you do to make a chocolate base is get almond bark from the store (or you can get the meltaways for candy making from the craft store or the Wilton's cake decorating site but for my purpose I use chocolate bark since it's less expensive and does the same job). Melt the chocolate and pour it into a cookie sheet lined with wax paper. Smooth it out flat and freeze it for about an hour (that makes it such a nice hardness that you can build anything on top of it); or you can let it sit out for about an hour and it is still hard but more pliable if you have to cut it to fit a cake or whatever.

After it is done being frozen, then just pick it up and place it on top of the cake and you are ready to build on it. Let's face it... if the kid wants or you think they would enjoy a fun cake; building on actual cake is just calling for disaster to strike since cake is soft, you cannot build much on top of it that wouldn't fall. You need the chocolate base. The picture above is of the cake I made (the motorcycle cake) with the track built on the base. I wish I had taken a better picture of it to show how tall the hills were but I didn't. (Hindsight is always 20/20, go figure!).

That is it for this segment of Fun With Cakes. Check back for more cake decorating tidbits in the cake decorating section in my labels. It is just plain good fun to decorate cakes. I love it!!


Digg!

Stumble Upon Toolbar

Friday, August 22, 2008

Teriyaki Beef

Richard's Aunt Linda is a great cook. Her teriyaki is to die for. So here is her recipe for Teriyaki Beef that is a quick and easy meal. The only work you have to really do is make the teriyaki sauce and let the meat marinate (overnight for best results).

Photobucket (Teriyaki Beef with sticky rice and stir fried vegetables covered in teriyaki sauce)

Teriyaki Beef

1 Tbsp grated fresh ginger root or 1 tsp ground ginger
2 cloves garlic, mashed
2 Tbsp brown sugar
1/2 cup soy sauce
2 Tbsp vegetable oil
Freshly ground pepper to taste
2 lbs beef round steak

Prepare the marinade by combining ginger, garlic, brown sugar, soy sauce, pepper. Add meat. Marinate overnight for best results.

Photobucket (Beef marinating)

Cook until desired doneness (broil or BBQ) approximately 5-7 mins on each side. Serve with sticky rice and stir fry vegetables.
*recipe for sauce can be doubled if table sauce is desired, just use half for marinade and half for table sauce over rice*


Digg!

Stumble Upon Toolbar

Peach Baked Beans

Here is my recipe for Peach Baked Beans. My family raves over it and when we get invited to BBQs or picnics I make these. It's a nice combination of sweet and smoky and you can basically customize the flavor to fit your tastes. Most of the work is slicing and dicing, and if you do that the night before than the rest is a piece of cake. Very easy to fix it and forget it in the crock pot.

Peach Baked Beans

1 can (54 oz) pork and beans
1 lb bacon, cooked and crumbled or 1/2 cup already prepared bacon bits
1 green pepper, chopped fine
1 small onion, chopped fine
1 bottle BBQ sauce, any flavor (we like the Jack Daniels original sauce)
1 Tbsp liquid smoke (if desired)
1 can cling peaches, diced fine (if you are using home canned peaches then use 6 halves diced fine)
1 tsp garlic or 1 clove, minced or pressed
1 tsp each salt and pepper

Combine in the crock pot, mix well. Turn on crock pot to low setting and let cook for 4-6 hours or on high for 2 hours. Enjoy with any BBQ food such as ribs, chicken, brisket, etc

This would be a meal for us with these beans: Pulled Pork Sandwiches, grilled corn on the cob, peach baked beans, corn bread.

They are a hit at any BBQ or picnic.


Digg!

Stumble Upon Toolbar

Shredded Beef Enchiladas

Photobucket


It's what we are having for dinner tonight! Last night I fixed pot roast (yeah with my soda in it LOL) and tonight with the leftovers we are having Shredded Beef Enchiladas. It is a great way to reuse leftover roast so it doesnt sit in the fridge until you have to throw it away. Here is how you do it:

With your leftover roast, shred it (it should just fall apart into string like pieces if its cooked just right and my soda helps it to just fall apart). This recipe is a great time saver since you just mix and bake. You can dice up the onion, olives, and tomato the night before or while the oven is heating up.

Shredded Beef Enchiladas (the recipe)

Preheat oven to 375 degrees.

2-4 cups leftover shredded pot roast (however much you have left)
1 can enchilada sauce (1/4 cup for the beef and rest for the top and bottom of the dish; I buy the largest can since I like my enchiladas saucy)
1/4 cup diced olives
2 cups shredded cheddar cheese
1 tomato (diced) (reserve some for the top)
1 can green chilies (reserve some for the top)
1/4 cup diced onion (reserve some for the top)
6-10 corn tortillas

Topping ideas
sour cream, guacamole, salsa

In a mixing bowl, combine the shredded beef, 1/4 cup enchilada sauce, olives, tomato, onion, green chilies, and 1/2 cup cheese. Mix well.

Spray a large casserole dish (8x13 rectangle works best) with cooking spray. Pour half the remaining enchilada sauce in the bottom. Fill the corn tortillas with the beef mixture and roll. Place the rolled tortillas in the dish seam side down. Repeat with remaining beef mixture and tortillas. Top with remaining enchilada sauce, then 1 1/2 cups of cheese, then olives, tomatoes, green chilies; Bake for 30 minutes.

Makes a great meal served with a green salad. Serves approximately 6-10 servings.
*See below for baking directions after freezing meals*

If you didn't want this for dinner the next night, you can also buy some freezable compartment meal trays or foil meal trays and freeze these meals and cook them when you want them. A good meal is 2 enchiladas with some salad or vegetable of choice. This is a good option if one of the family members works some nights or evenings and the other family members can take them out and bake them themselves. This works especially good if you have a take-out happy hubby who never knows what to fix (like mine LOL). Making and freezing meals ahead of time saves money from going out to eat and you get more nutritious food than you would going out.

If you are going to make this meal for freezing for later, then bake at 350 degrees for about 45 minutes or until cheese is bubbly. DO NOT bake before freezing. Put them together in the trays and then freeze. Good idea if you have a chest freezer on hand.


This is what it looks like before going into the oven.


Photobucket


This is what it looks like just out of the oven 30 minutes later. Doesn't that look yummy? The cheese is just melted and browned and the flavors mesh together perfectly and the flavor is out of this world!


Photobucket


Digg!

Stumble Upon Toolbar

Thursday, August 21, 2008

Save money by canning

Photobucket

Canning... alot of people think it is so hard to do. It is easy! Just time consuming but well worth the time spent which means you keep more of your money in your pocket when you can food.

First you need some good canning equipment. I recommend using a Hot Water Canner because most food is acidic enough to warrant preserving with the boiling water method. This canner in the link is exactly what I have in my house and use religiously when I do my canning. This is the method I prefer since it is very easy to do. Then you need the accessories: Jar Lifter (to lift the jars safely from the hot water bath), funnel, mason jars with lids and screw bands (they come in quarts and pints available at Walmart or whatever other store you have that sells canning equipment, and finally, you need a cook book. I use this one called Putting Food By; it is very easy to use and explains everything in great detail.

When I can, I preserve pears, peaches, cherries (when they are affordable), beets (I usually pickle them as they taste the best that way in my opinion), pickles (they can get so expensive at the store so why not make my own). You also can make salsa, spaghetti sauce, relishes, and a whole lot more; but these are the items that my family eats tons of so it saves me a bundle on buying those at the store all year round at outrageous prices.

Support your local farmers market for the food you need to preserve. I have a great relationship with 3 of the local farms in the area when I need my produce for canning. You can get great deals on boxes of fruit rather than by the pound. This may sound expensive but I pay about $24 for a box of pears and I usually get 2 of them to make 48 pints of canned pears (the kids absolutely go nuts for them!) so thats about $1.00 a jar that it costs me to make for the fruit... you cannot get homemade quality pears for $1.00 a can at the grocery store (The DelMonte jarred fruit comes close but its also double the price), so I save money since my kids eat tons of them. What I buy at Farmer's Market pays for itself during the winter when I do not have to buy canned peaches, pears, beets, or pickles at the store and it lasts me all year until I can the next year. Especially with the state the economy is in, you need to save all you can where you can. Canning is an excellent way to save money on your grocery bill. Try it, you will like it!


Digg!

Stumble Upon Toolbar

Get Fizzy With It!

Ever wonder why your pot roast is tough? I once wondered the same thing. I tried meat tenderizer (doesn't work well with roasts as it does with thinner cut meats), the cut of meat, etc and what I found is that something so simple is so effective.

My mom told me to put some soda in with the roast. Soda? yeah soda... I use Coke or Pepsi (or any cola) or Dr. Pepper. When I make my roast in my crock pot, I add about 1/8 cup of soda pop to the liquid I put in the crock pot. I have found that my roast comes out falling apart and the gravy I make from the drippings and juice is richer than usual.

Now, when I make a pot roast (I always use my crock pot, I do not do roasts in the oven or dutch oven; they do not turn out for me like I would like using those methods for me anyway) I add the soda and other liquids and spices and let it cook. I have found this effective for beef roasts, I do not need it for pork roasts for some reason. Try it sometime, you will be surprised!


Digg!

Stumble Upon Toolbar

Mexican Mac and Cheese

Everyone loves macaroni and cheese. Especially when it is homemade. But, when you make homemade macaroni and cheese there is so much left over since most recipes make tons for an army. So I have made up a new meal out of that left over mac and cheese and my family loves it. I have created Mexican Mac and Cheese. To do this, I just take my left over mac and cheese and add some things to it. Here is the recipe:

Mexican Macaroni and Cheese

Leftover macaroni and cheese
1 lb of hamburger (made into taco meat with any taco seasoning packet)
1 can of Rotel mild tomatoes with green chiles or 1/2 cup any flavor salsa
1/4 cup diced olives
1 cup shredded cheddar cheese
tortilla chips (broken into small pieces)
sour cream, lettuce, tomatoes, salsa for toppings (optional)

First, cook the hamburger and drain the fat; make into taco meat according to package directions on taco seasonings. Shred your cheese. Crush your tortilla chips (any favorite chip will work). In a mixing bowl, take the macaroni and cheese and mix it with the taco meat, olives, rotel tomatoes or salsa and mix it good. Spray large baking dish with cooking spray and then place crushed tortilla chips on the bottom, then spoon in the macaroni mixture, top with cheese and a few of the olives and tomatoes if desired. Bake at 350 for 30 minutes. Top with sour cream, lettuce, tomatoes, salsa if desired.

I usually serve this with a salad on the side and/or extra chips and salsa on the side. Now you have a brand new meal with what you had last night and its not like having the same old thing... again... Its something new!!


Digg!

Stumble Upon Toolbar